Marching Handbook
FOREWORD
This handbook is not intended to be an exhaustive primer detailing every aspect of “The Marching Owls” visual vocabulary. Below you will find general verbal and visual descriptions of our visual program, which you will learn and refine throughout the marching season. If you have any questions or concerns, please feel free to email Dr. Harris with your query.
For the performer, marching band juxtaposes sound and sight in a unique and enjoyable way. Performers are responsible for presenting both musical and visual elements, and the quality of one strongly influences the perception of the other. As our ability to achieve excellence within one strongly impacts our ability to achieve excellence in the other, our goal is to excel both visually and musically at the same time.
The visual technique used by “The Marching Owls” is based on natural human movements that are achievable, efficient, and aesthetically pleasing. The goal of marching is uniform movement, and this page focuses on two main areas of focus that help us to achieve that. They are:
- The Self
- Individual technique, carriage, and posture.
- Transitions (changes of direction).
- The Ensemble
- Relationship to field/others throughout learning/performance.
Effect of individual/section consistency on overall group performance.
- Relationship to field/others throughout learning/performance.
-
Part 1: The Self
We will move and sound like what we hold in our minds. This section provides a reference for many aspects of individual technique that you will refine during August Band Camp and during the marching season.
Posture and Instrument Carriage
The orientation of instruments to the body should complement, rather than change, correct posture. There are three general positions that the instrument will be held in, trail, carry, and playing position. Slight variations in hand placement will exist between instruments, but some general points are provided for consideration:
- The focus of our posture is alignment over stiff bearing. Exercises will be explored throughout the season, but our main focus is on natural body alignment to allow for ease of motion and maximum musical performance.
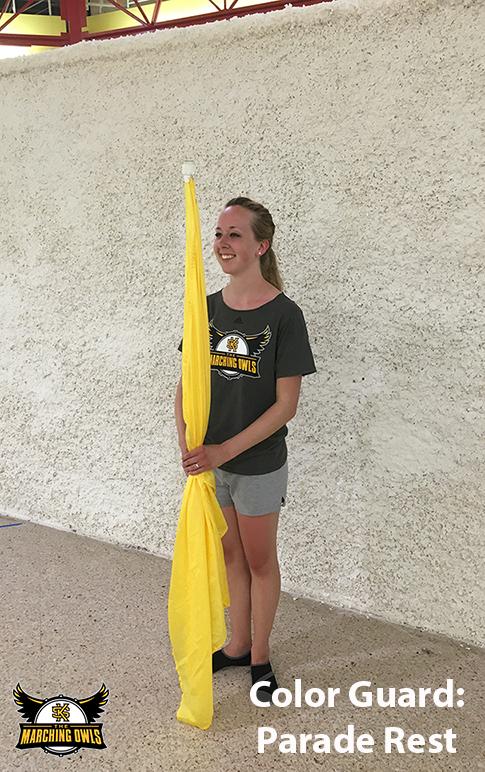
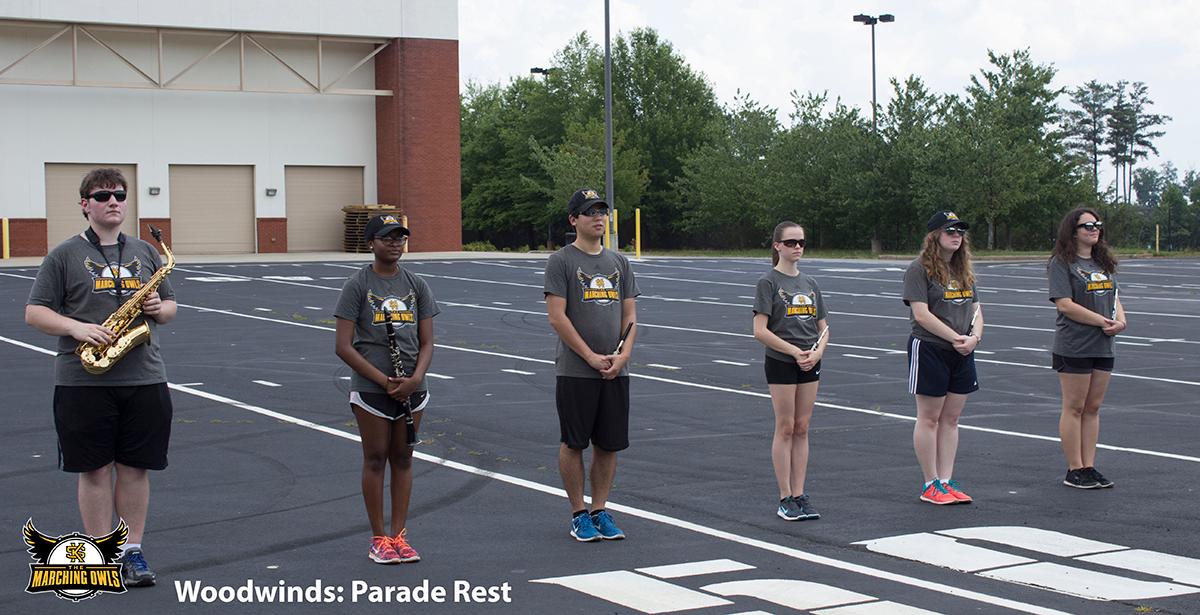
- Please note that our toes are together at all positions of uniform bearing (e.g. parade rest, carry, playing position). This may be a departure from the visual style you are accustomed to elsewhere.
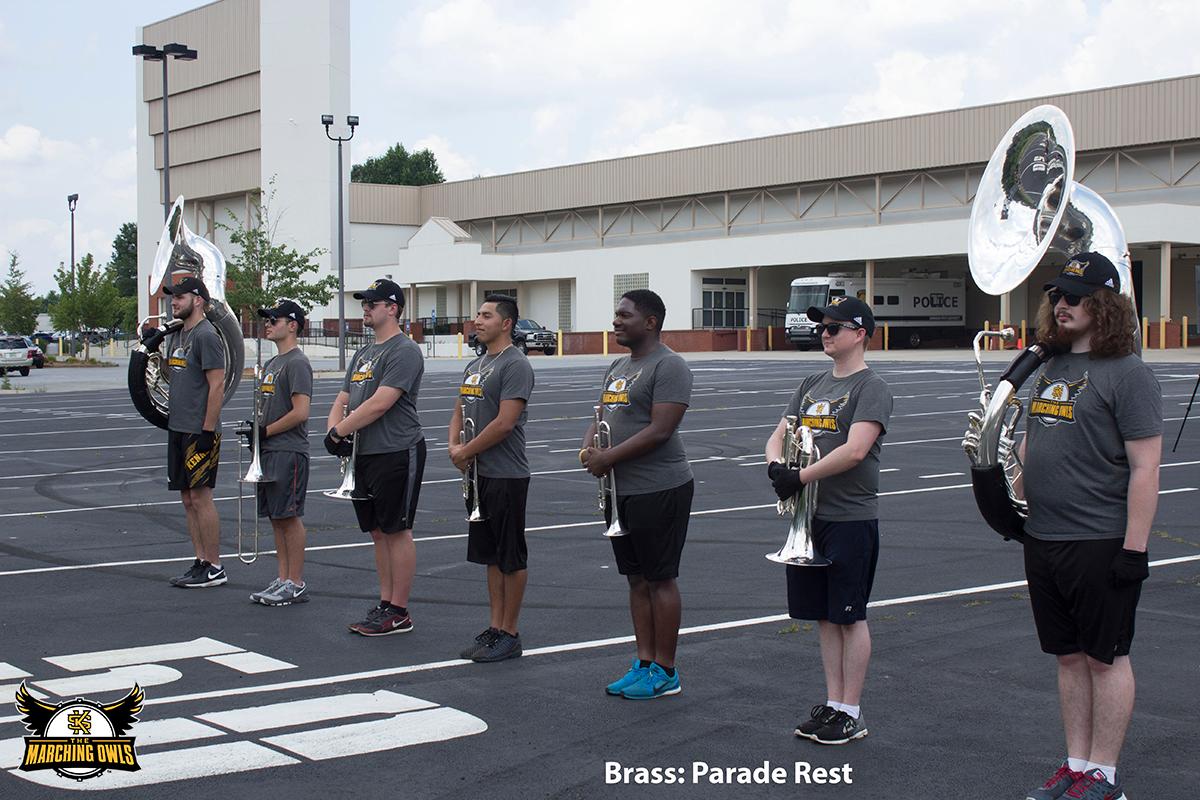
- At parade rest, the instrument is positioned low and comfortably to allow for extended periods of stasis.
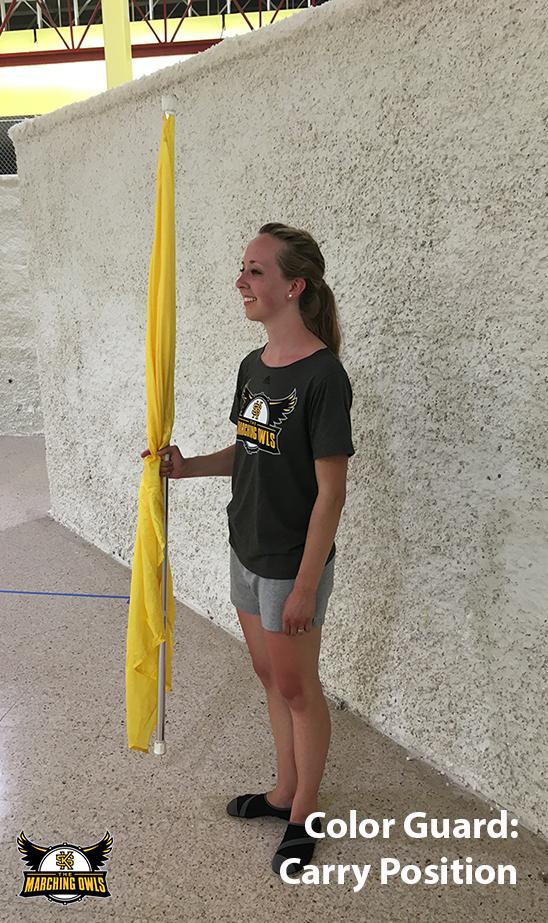
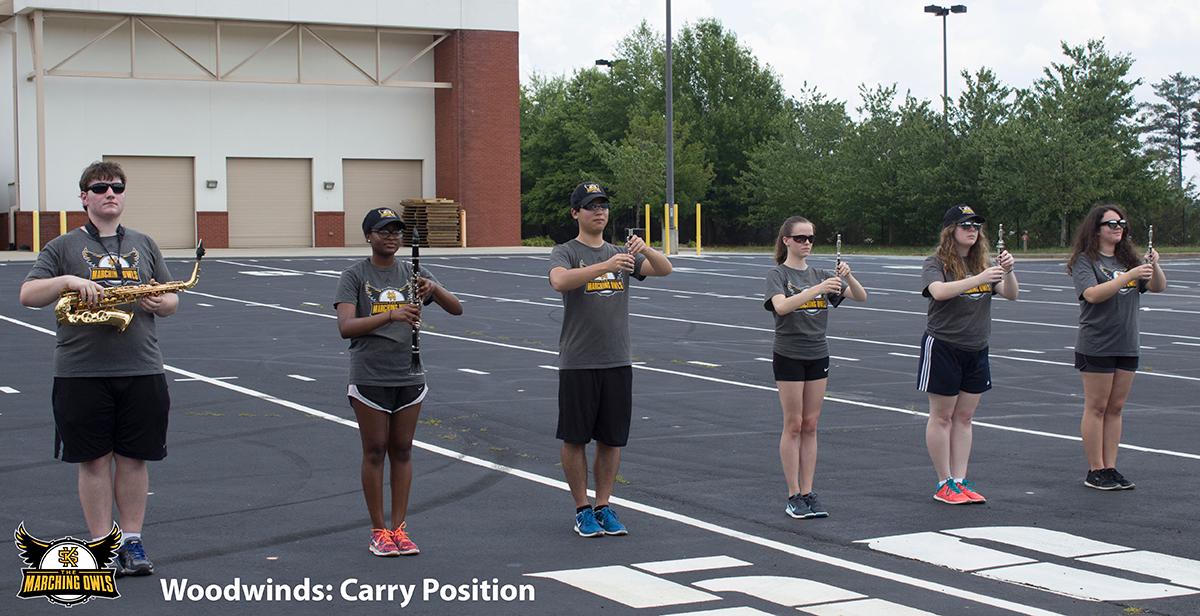
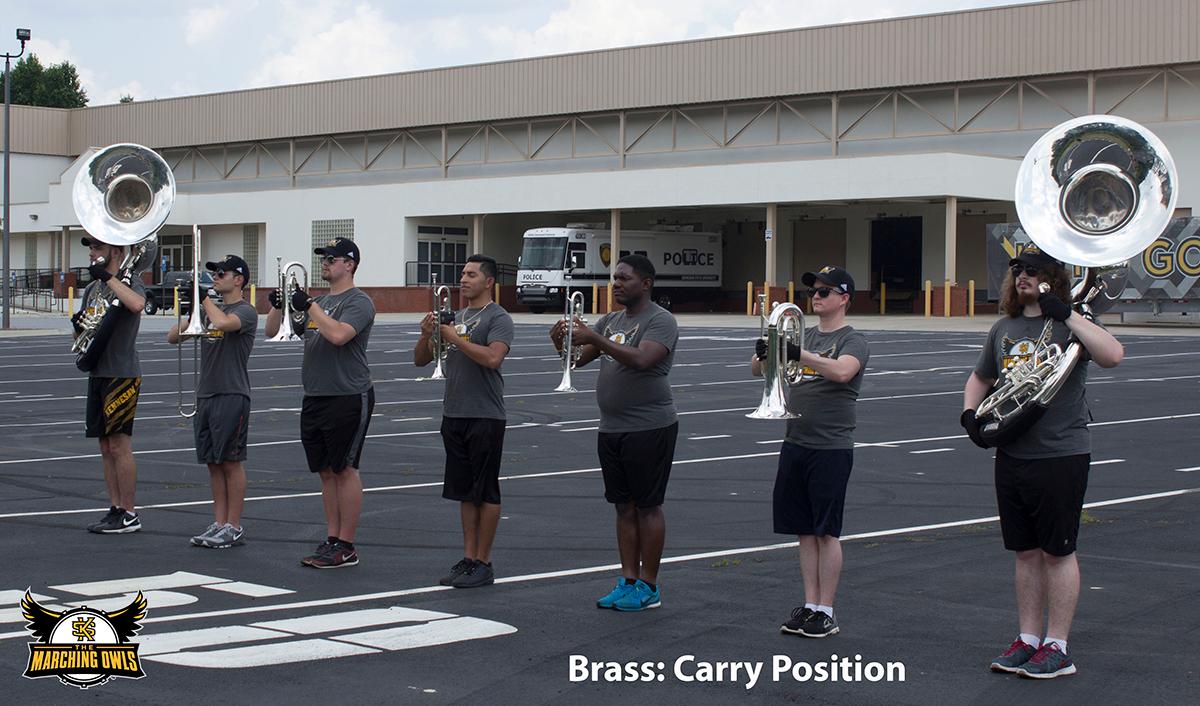
- At carry, the instrument is positioned to allow for easy movement to a playing position. For most instruments, this means that the mouthpiece/playing surface is within the plane of the lower jaw. For other instruments (e.g. saxophone) this may look slightly different, but will serve the same purposes. For most instruments, the orientation of the arms, hands, and instrument should form a pentagon where the performer is situated at the bottom of the shape and the instrument is at the top. The majority of instruments will be 2-3 fists distance away from the body.
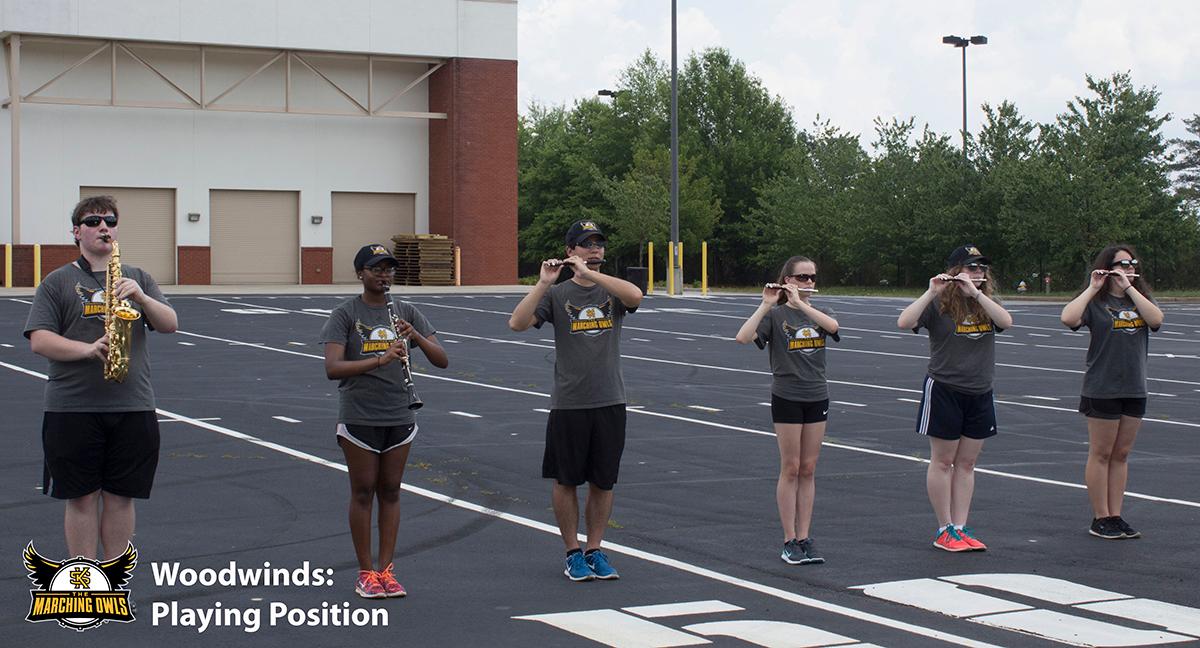
- At playing position, the instrument is positioned to allow for correct performance actions and maximum sound projection. This requires a 10˚ lift above parallel for bell-front brass, and for the proper playing angle to be maintained within all woodwind instruments (no unnatural angles). Uniformity in instrument angle, hand placement, and finger position are important here. Further details can be seen in the slideshow below, and will be explained in detail by your section leader at August Band Camp.
Woodwind and Brass Posture and Instrument Carriage
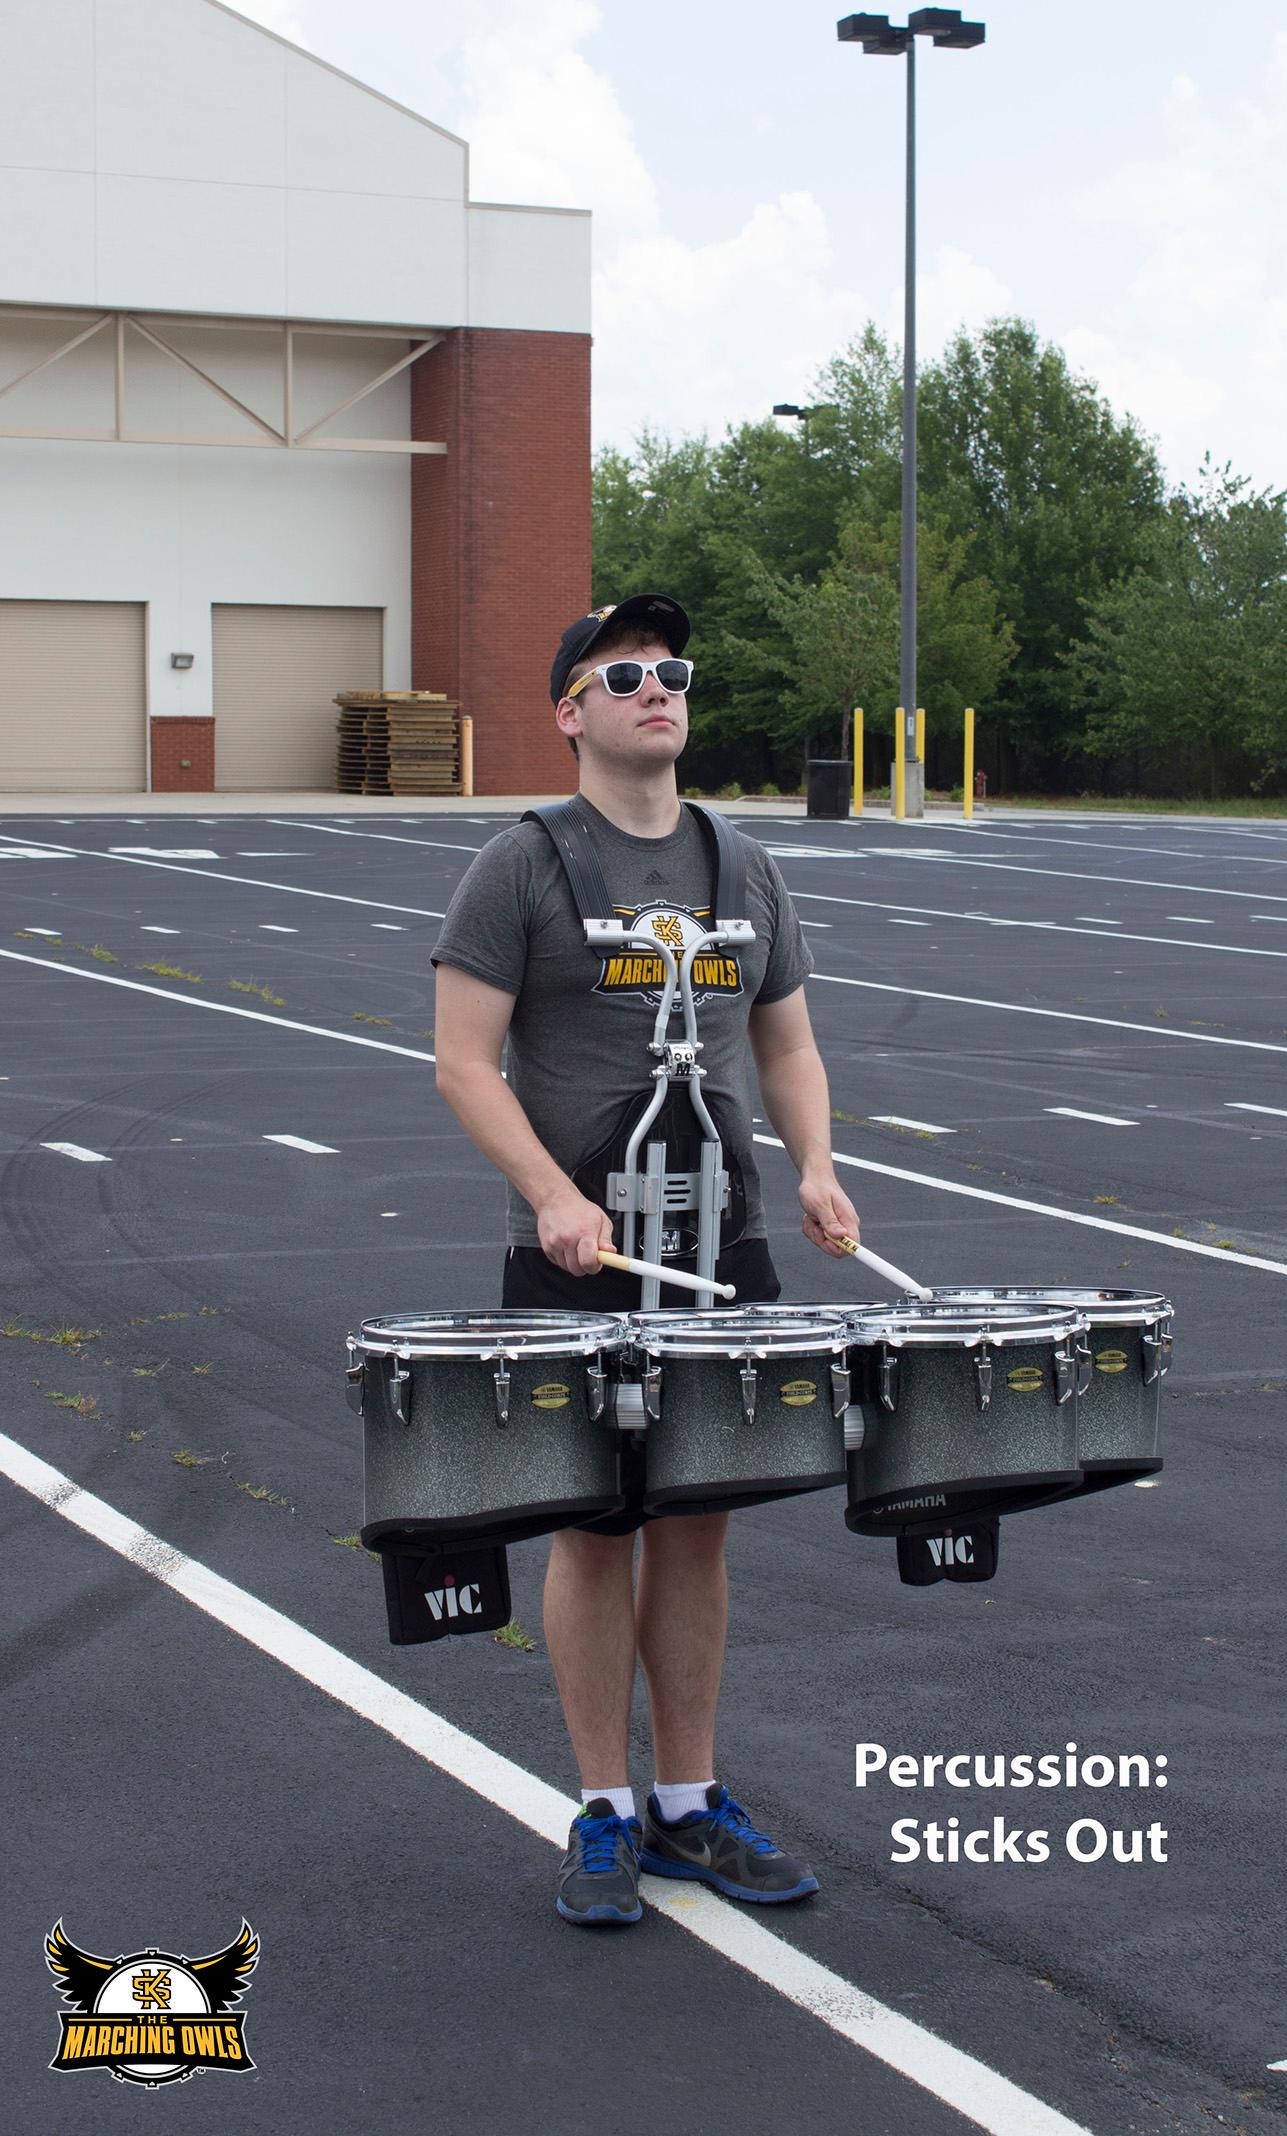
Battery and Guard Posture and Equipment Carriage
Forward Technique:
Viewed as stylized or “elegant” walking, forward technique is the most similar to normal motion. We focus primarily on the initiation and follow-through of the stride, as highlighted below. Please note that our knees do bend slightly on the roll-through of the step, which may be a departure from the visual style you are accustomed to elsewhere!
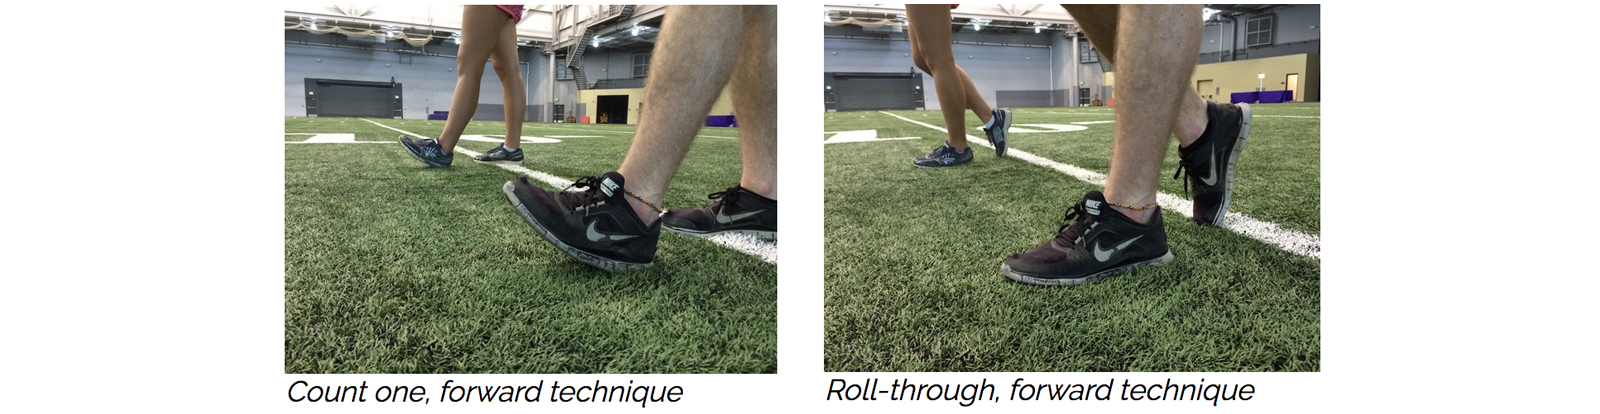
To see forward technique in action, please watch the short video below:Note: On the videos above, you will notice that close of each visual phrase uses the platform of the foot (the forward third) in a tondu similar to classical ballet. As you tondu-close, think about elongating and elevating your body into the halt.
Backward Technique:
Moving backwards is not something humans do naturally, but this style of motion allows for the combination of an efficient use of energy, ease of motion, and the recruiting of natural stabilizers within the body. Watch the video, and notice the flexibility of the knees and the focus on movement away rather than elevation up.
Mark Time:
“The Marching Owls” use two variants of mark time throughout the season.
- Low Mark Time is characterized by bending the knee slightly and raising the heel approx. 1″ off the ground. The heel makes contact with the ground on each beat, helping the performer to keep time. Due to the nature of their instruments, battery percussion uses a different form of mark time that will be addressed during August Band Camp.
- High Mark Time is characterized by lifting the foot fully off the ground, bending the knee so that the upper leg of the performer is at roughly a 90˚ to the ground, placing the instep of the foot against the knee of the non-moving leg, and pointing the toe. This is primarily used during our pregame performance.
Slides:
Slides allow for a wide range of visual maneuvers, but must allow for a maximized air column to exist, too. To accomplish this the body is oriented to keep the line of the feet in the direction of motion and the upper body oriented in the direction of musical projection (usually the front or back sideline). Checkpoints for successful performance are below:
- Hips/belly-button at 45˚
- Shoulders at 90˚
Forward Slide:
A simple combination of forward technique with slide orientation. Short/Long leg perception is strongest in this context, as it is most identifiably similar to normal motion. Regardless of variation performed (left-lead or right-lead), the opposite elbow/shoulder will need to be brought forward to attain 90˚ shoulders, and the opposite leg will feel shorter/more difficult.
Backward Slide:
A combination of backward technique and slide orientation. Direction of motion is the most problematic attribute to master in this combination. Thinking of the chest as open and the legs as long will help this.
Transitions (Change of Direction)
The goal of transitions are to seamlessly bridge any gap between visual phrases, just as their musical counterparts connect musical phrases and ideas. Through the accurate and consistent achievement of these, the visual thread is maintained. All transitions engage the platform (see backward technique), save for those moving from a forward technique phrase to another forward technique phrase. Ideally, these transitions are executed in a way that isolates locomotion below the waist — imperceptible in upper body carriage and musical performance.
- Forward to Forward (Slides): Carve an angle bisecting the overall arc to be transitioned (ex. 45˚ out of an overall 90˚) with your last step of one phrase, rolling through in the intermediary angle. Passing through, articulate in the new direction. Forward technique is used throughout.
- Forward to Backward (Slides): Carve an angle bisecting the overall arc to be transitioned (ex. 45˚ out of an overall 90˚) with your last step of one phrase, using the platform to arrest your progress. Using this same motion, transition into relevé. Passing through, articulate in the new direction with backward technique.
- Backward to Forward (Slides): Lock up with the final step of one phrase, bisecting the overall arc to be transitioned (ex. 45˚ out of an overall 90˚) with the angle of the locked foot. This both arrests the previous motion and eases the transition into the new direction of travel. Re-articulate in the new direction using forward technique.
- Backward to Forward (General): On the final count of the previous phrase, use your platform to lock up and control your backward motion. Rearticulate your leading foot (likely your left) in the new forward direction.
- Forward to Backward (General): On the final count of the previous phrase, roll through your foot carving the 45˚ (where needed). Articulate your foot using backward technique on count one of the new phrase in the appropriate direction.
In combination, these transitions link together seamlessly. At their most basic level, they are combined into box exercises, similar to those highlighted below:
-
Part 2: The Ensemble
Application of technique to drill works as follows:
- All drill is learned to a printed coordinate, and refined for performance using a consensus of the step-size, form, and coordinate.
- All coordinates are found using the system outlined in Decoding Coordinate Sheets.
- All coordinates are connected by straight line paths.
“The Marching Owls” utilize three different ‘looks’ to our drill learning and cleaning rehearsals. The are:
- Field/Coordinate Reference: The KSUMB uses this method to learn drill. Each performer receives a coordinate sheet, and determines their x and y positions using the techniques explained in Decoding Coordinate Sheets. When cleaning drill, performers reference the field markings, using them as midpoints for set-to-set transitions. Sometimes these are “standard” step sizes (e.g. 8 to 5, 6 to 5, 12 to 5), where midsets are clearly seen on the field, where other times a midset might be the crossing of a certain field marking on a given count of the phrase (i.e. “Cross the 45 yard line on count 6 of the 16 count phrase). In the video below, we demonstrate this by pointing at each 4-count midpoint as our focus shifts to it in sequence. The goal is to maintain a consistent path and step size throughout the phrase, using the markings on the field.
- Step Size Reference: The KSUMB uses an “adjusted step” system, meaning that the distance covered throughout a set will be equally divided into the counts available to you. This step size will remain the same throughout a given phrase, and is sometimes a “standard” size (e.g. 8 to 5, 6 to 5, 12 to 5). When we focus on step size, we are working to build consistency in our awareness of this feature, especially at the beginning or end of a visual phrase.
- Form/Body Reference: Once drill has been learned, performers have a basic understanding of what shapes they are making (e.g. line, block, circle, square). When we focus on form and/or body, we are focusing on our alignment and orientation to the other people that make up the form around us. In the video below, we demonstrate this by pointing at the centerline of the person we are referencing. The goal is to maintain the proper orientation and relationship with your visual reference throughout the phrase.
Variability Within Effort (Step Size, Tempo, etc…)
Change in step size:
- Step size is a function of technique, and does not change across the vast majority of available step sizes.
- Each set-to-set transition is self-contained, step size remains consistent from beginning to end of any given phrase.
- Step size change occurs on count one of a new set. Work to avoid a gradual change at the end (or beginning) of a transition.
Change in tempo:
- Control of tempo is a function of technique, and does not change across tempi.
- As each set-to-set transition is self-contained, tempo remains consistent from beginning to end of any given sequence.
- Where tempo does change within a visual phrase (e.g. accelerando, rallentando), clear visual and aural markers will be provided to assist you.
- As a default, changes in tempo will occur on count one of a new set.
Again, this handbook is not intended to be an exhaustive primer detailing every aspect of “The Marching Owls” visual vocabulary. We hope you feel more informed about our visual program in general, but if you have any questions or concerns, please feel free to email Dr. Harris your query.
We’re looking forward to seeing you in August!! GO OWLS!!!!
A HUGE THANK YOU to the individuals who helped to make these videos and photos possible:
Hannah Culp, James Down, Mia Jordan, Kaelyn Putnam, Destiny Clark, Jonathan Swann, BellDeVry Dubuche, Pablo Gonzales, Andrew Owen, Louis Livingston, Matheus Prates, Kyle Loughman, Aaron White, Brooks Payne, Christina Vehar, Nick Anderson, and Melissa Tayon (Performers).
Mimi Phillips (Photo and Video Shoot Assistance)
Mr. Richard Peluso – Coordinator of Band Operations
Dr. Debra Traficante – Director of “The Marching Owls,” Associate Director of University Bands
Dr. David Kehler – Director of University Bands, Kennesaw State University
Dr. Stephen Plate – Director of The School of Music, Kennesaw State University